Troubleshooting
Troubleshooting is the method of identifying and solving problems in a system such as a computer, network, or software application. Below are some common troubleshooting issues along with their possible causes and solutions:
a. Computer Does Not Turn On
- Cause: The power cable may be unplugged, or the power button may not be pressed properly.
- Solution: Make sure the power cable is securely connected. Press the power button firmly and correctly.
b. No Internet Connection
- Cause: Wi-Fi might be turned off, or the router may not be functioning.
- Solution: Turn on Wi-Fi and restart the router. Also, check if there is any issue with the internet service provider.
c. Mouse or Keyboard Not Working
- Cause: The cable may be loose or disconnected, or the battery may be weak (for wireless devices).
- Solution: Reconnect the cable properly or replace the battery. You can also try connecting the device to another USB port.
d. Computer Running Slowly
- Cause: Too many programs are open, or the system does not have enough memory.
- Solution: Close unnecessary programs, restart the computer, and remove unwanted files.
e. Screen Is Frozen
- Cause: A program may have crashed or stopped responding.
- Solution: Press Ctrl + Alt + Delete and end the unresponsive program. If the problem continues, restart the computer.
f. No Sound from the Computer
- Cause: The volume may be muted, or the speakers may not be properly connected.
- Solution: Unmute the volume and check the speaker connections. You can also test with headphones.
General Troubleshooting Techniques
Troubleshooting is the process of identifying and fixing problems in a computer system, software, or hardware. By following proper troubleshooting techniques, most issues can be solved quickly and efficiently. Below are the general steps of troubleshooting explained in a clear and simple way:
Step 1: Identify the Problem
First, clearly understand what the issue is. For example, is the computer not turning on? Is a program showing an error? Identifying the exact problem is the most important step toward solving it.
Step 2: Check the Basics
Start with simple checks:
a. Make sure all cables and connections are properly plugged in.
b. Confirm that the power supply is working and the device is switched on.
c. For software problems, ensure the program is correctly installed and updated.
Step 3: Restart the System
Sometimes, restarting the computer or the software can fix many minor problems such as frozen applications or temporary system errors.
Step 4: Look for Error Messages
Check if any error messages or codes appear on the screen. These messages often give clues about the problem. You can search online for solutions using the error code.
Step 5: Use Safe Mode (for Software Problems)
If the problem occurs during startup, boot the computer in Safe Mode. Safe Mode runs only essential programs and drivers, which helps in identifying and fixing software-related issues.
Step 6: Check Hardware Components
a. Inspect devices such as the keyboard, mouse, monitor, or storage devices for any visible damage or loose connections.
b. If possible, test the hardware on another computer to confirm whether it is working properly.
Step 7: Update Drivers and Software
Ensure that all system drivers (such as graphics or network drivers) and software programs are updated. Outdated drivers or programs can cause system problems.
Step 8: Use Diagnostic Tools
Most operating systems and third-party applications provide built-in diagnostic tools. These tools can scan and detect issues related to hardware, memory, or disk performance.
Step 9: Check System Logs (For Advanced Users)
Advanced users can review system logs to find detailed information about system errors. System logs record events and errors that can help identify the root cause of the problem.
System logs provide useful information about errors or crashes. They record detailed events that occur in the system, which can help identify the exact cause of a problem. Checking system logs is especially helpful when dealing with complex technical issues or software-related errors.
Step 10: Isolate the Problem
If the issue seems to be related to a specific hardware device or software program, try isolating it. This means temporarily removing, disconnecting, or disabling the suspected component to see if the problem is resolved. For example, unplug external devices like printers or USB drives, or uninstall recently installed software. If the problem stops, you may have found the cause.
Step 11: Seek Help or Do Research
If you are unable to fix the issue yourself, look for help online or check the device’s user manual. You can also contact technical support for assistance. Many problems have already been experienced and solved by others, so researching the issue can often lead to a quick solution.
Following these troubleshooting steps can help solve most computer-related issues in an organized and effective manner.
Steps of Troubleshooting
Troubleshooting is a systematic method used to identify and fix problems. By following a clear and organized process, most computer or device issues can be solved effectively. The following steps explain the basic troubleshooting procedure:
Step 1: Identify the Problem
Begin by clearly understanding the issue. For example, is the system not turning on, or is there an error message displayed? Ask questions like, “What exactly is wrong?” to define the problem accurately.
Step 2: Check for Simple Solutions
Start with basic checks:
a. Make sure all cables, power cords, and external devices are properly connected.
b. Confirm that the device is powered on and that essential components such as the monitor and keyboard are working correctly.
Step 3: Reproduce the Problem
Try to recreate the issue under controlled conditions. This helps you understand when and how the problem occurs, such as while using a specific program or after connecting a new device.
Step 4: Restart the System or Software
Restarting the computer or the affected program can fix many common problems, especially those caused by temporary system errors or software glitches.
Step 5: Check for Error Messages or Codes
Pay attention to any error messages or codes that appear on the screen. These messages often provide important clues that can help in finding the correct solution.
Step 6: Isolate the Problem
Determine whether the issue is related to hardware or software. You can disconnect external devices, start the computer in Safe Mode, or use diagnostic tools to identify the exact source of the problem
Step 7: Consult Documentation or Help
Refer to the user manual, help files, or reliable online resources for possible solutions. Many common problems are already documented, and other users may have faced and solved similar issues.
Step 8: Check for Updates
Make sure that all drivers, software programs, and the operating system are up to date. Outdated drivers or applications can cause system errors, so regular updates are important for smooth performance.
Step 9: Perform System Diagnostics
Use built-in or third-party diagnostic tools to check for hardware-related problems, such as memory (RAM) errors or hard drive failures. Most operating systems provide diagnostic utilities to help detect these issues.
Step 10: Test with Known Good Components
If you suspect a hardware problem (for example, faulty RAM or a damaged hard drive), test the system using components that are known to be working properly. This helps confirm whether the hardware is the cause of the issue.
Step 11: Fix or Replace Faulty Components
Once the faulty hardware or software has been identified, take the necessary action. This may include reinstalling or updating software, repairing system settings, or replacing damaged hardware parts.
Step 12: Verify the Solution
After applying the fix, test the system carefully to make sure the problem has been completely resolved and no new issues have appeared.
Step 13: Document the Issue and Solution
Record the problem and the steps taken to solve it. Keeping documentation helps in case the same issue happens again and serves as a useful reference for future troubleshooting.
Troubleshooting Boot Problems
Boot problems occur when a computer fails to start properly. These issues can be caused by hardware or software failures. Here is a step-by-step guide to help diagnose and fix boot problems:
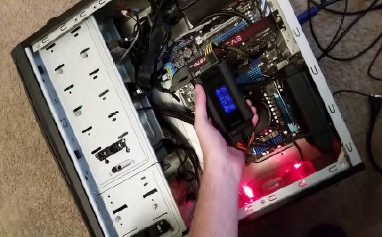
Step 1: Check Hardware Connections
Ensure that all cables and peripheral devices are properly connected. Open the computer case (if possible) and verify that internal components such as RAM, graphics cards, and expansion cards are securely seated.
Step 2: Verify Power Supply and Outlet
Make sure the power outlet is working correctly. Check the power supply unit (PSU) and, if necessary, try using a different power cable or outlet to rule out power issues.
Step 3: Check Monitor and Display
Confirm that your monitor is turned on and properly connected to the computer. If needed, test with another monitor or cable to ensure that the display is not causing the problem.
Step 4: Disconnect External Devices
Remove all external devices such as USB drives, printers, or external hard drives. Sometimes, connected peripherals can interfere with the boot process.
Step 4: Disconnect External Devices
Remove all external devices such as USB drives, printers, and external hard drives. Sometimes, these devices can cause conflicts and prevent the computer from booting properly.
Step 5: Check BIOS/UEFI Settings
Enter the BIOS/UEFI setup by pressing the designated key during startup (commonly F2, F12, Del, or Esc). Verify that the correct boot drive is selected as the primary boot device. Incorrect boot order can prevent the system from starting.
Step 6: Boot into Safe Mode
If using Windows, try starting the computer in Safe Mode. Safe Mode loads only essential drivers and programs, helping identify if a software or driver is causing the issue.
On Windows 10/11: Press Shift while clicking Restart from the login screen or use the System Configuration (msconfig) tool.
On older versions of Windows: Press F8 during startup to access the Advanced Boot Options menu.
Step 7: Use Bootable Media
Create a bootable USB drive or DVD with your operating system (Windows, Linux, etc.). Boot from this media and choose the Repair or Troubleshoot options to fix startup problems.
Step 8: Check Error Messages
Pay attention to any error messages or codes displayed during boot. These messages often provide useful information to identify the cause of the problem.
Step 9: Run Diagnostic Tools
Many computer manufacturers include built-in diagnostic tools accessible from the BIOS/UEFI menu. Use these tools to test hardware components such as memory, storage drives, or graphics cards.
Step 10: Repair or Reinstall the Operating System
If the problem continues, you may need to repair or reinstall the operating system:
Step 11: Data Recovery
Before reinstalling the OS, consider recovering important files. You can use live Linux distributions or specialized data recovery software to retrieve data from the system before performing a reinstall.
These steps provide a structured approach to diagnosing and resolving boot problems, helping to identify whether the issue is hardware-related, software-related, or caused by external devices.
Troubleshooting boot time error messages
Troubleshooting boot-time error messages is important for identifying and fixing issues that stop your computer from starting correctly. Follow these steps to address common boot errors:
Step 1: Read the Error Message
Carefully read the error message displayed on the screen. The message usually contains important information about the cause of the problem. Take note of any error codes or descriptions.
Step 2: Restart Your Computer
Some boot errors can be caused by temporary glitches. Restarting your computer may resolve the issue without further action. restarting your computer to see if the issue resolves itself.
Step 3: Boot into Safe Mode
If you are using Windows, try starting the computer in Safe Mode. Safe Mode loads only essential drivers, helping you determine if the error is caused by software or drivers.
Step 4: Use System Restore (Windows)
If Safe Mode is accessible, use System Restore to revert the computer to a previous state when it was working correctly. In Windows, go to Control Panel > Recovery > Open System Restore and follow the prompts.
Step 5: Last Known Good Configuration (Windows)
During startup, you can select the Last Known Good Configuration option if available. This restores the system settings to the last working configuration.
Step 6: Check Hardware Connections
Ensure all hardware components are properly connected, including RAM, hard drives or SSDs, and peripheral devices. Re-seat components such as RAM or expansion cards if necessary.
Step 7: Check for Disk Errors
Boot from a bootable USB or DVD (such as Windows installation media or a live Linux distribution). Use built-in disk utilities to check and repair disk errors:
Step 8: Review BIOS/UEFI Settings
Access the BIOS/UEFI setup and verify the boot device order. Ensure the correct drive is selected as the primary boot device.
Step 9: Note Error Codes
Record any error codes or specific messages displayed. These details can help you search online or consult the manufacturer’s documentation for troubleshooting guidance.
Step 10: Update or Roll Back Drivers
If a driver is mentioned in the error message, try updating it to the latest version or rolling it back to a previous stable version.
Step 11: Repair or Reinstall the Operating System
Use bootable installation media (Windows or Linux) to repair or reinstall the operating system. This often resolves persistent boot-related issues.
Step 12: Data Recovery
Before reinstalling the OS, recover important files if needed. Use live Linux distributions or data recovery software to retrieve files safely.
Step 13: Seek Professional Help
If the problem persists or is hardware-related, contact a professional technician or the device manufacturer’s support for assistance.
Following these steps provides a complete and systematic approach to resolving boot-time errors, whether caused by software, drivers, or hardware issues.
Troubleshooting System Slowdowns
System slowdowns can be frustrating, but identifying the cause can help restore performance. Here’s a step-by-step guide:
Step 1: Identify the Cause
Determine when the slowdown occurs—during startup, while running certain apps, or generally throughout use.
Step 2: Monitor Resource Usage
Use Task Manager (Windows) or Activity Monitor (macOS) to check CPU, RAM, and disk usage. Look for processes consuming excessive resources.
Step 3: Close Unnecessary Applications
Shut down unused programs and background processes to free up system resources.
Step 4: Restart Your Computer
A simple reboot can fix temporary glitches or memory leaks affecting performance.
Step 5: Update Software
Keep your operating system, drivers, and applications up to date to prevent compatibility issues.
Step 6: Scan for Malware and Viruses
Run full system scans using reliable antivirus and anti-malware tools. Malware can greatly slow down a system.
Step 7: Check for Disk Errors
Use disk utilities (chkdsk on Windows or fsck on Linux/macOS) to detect and repair errors that may affect performance.
Step 8: Manage Startup Programs
Disable unnecessary startup programs to reduce boot time and free resources:
- Windows: Task Manager > Startup tab
- macOS: System Preferences > Users & Groups > Login Items
Step 9: Manage Background Services
Review and disable unnecessary background services or scheduled tasks consuming system resources.
Step 10: Optimize Disk Space
Delete unnecessary files or apps, and consider moving large files to external or cloud storage.
Step 11: Upgrade Hardware
If your system is old, consider upgrading components such as RAM, replacing a hard drive with an SSD, or improving the graphics card.
Step 12: Monitor Temperatures
Overheating can reduce performance. Use tools like HWMonitor or SpeedFan to check CPU and GPU temperatures, and clean dust from fans and heat sinks if needed.
Step 13: Check for Software Conflicts
Look for recently installed software or drivers that may conflict with existing programs and resolve any conflicts.
Step 14: Use System Maintenance Tools
Step 15: Reinstall the Operating System
If performance issues persist, consider reinstalling the OS to start fresh. Always back up your important data before doing this.
Step 16: Seek Professional Help
If slowdowns continue after all troubleshooting steps, it may be a hardware issue or a complex software problem. Consult a professional technician for further diagnosis.
These additional steps help maintain optimal system performance and address deeper issues causing slowdowns.
Troubleshooting Specific Components
When problems affect a specific hardware component or peripheral, targeted troubleshooting is necessary. Here are some common components and how to address issues:
Step 1: Troubleshooting a Graphics Card
If you notice graphical problems such as screen flickering, artifacts, or no display:
- Ensure the graphics card is properly seated in the PCIe slot.
- Verify that all power connectors to the graphics card are securely connected.
- Update or reinstall the graphics drivers.
- Monitor the GPU temperature using tools like MSI Afterburner or GPU-Z to check for overheating.
Troubleshooting RAM (Memory)
If your computer is experiencing system crashes, Blue Screen of Death (BSOD), or frequent application errors, the problem may be related to RAM.
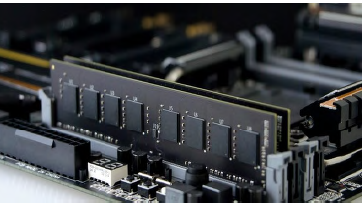
- Remove and reinstall the RAM modules to make sure they are properly inserted into the memory slots.
- Use a memory testing tool such as Windows Memory Diagnostic to detect possible RAM problems.
- Test each RAM module separately to identify any defective memory stick.
- Verify that the RAM is compatible with your motherboard and properly configured in the BIOS/UEFI settings.
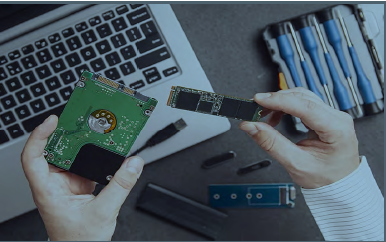
Troubleshooting Hard Drive/SSD:
If you’re experiencing slow file access, data corruption, or system freezes:
• Check disk health using SMART monitoring tools (e.g., CrystalDiskInfo for Windows).
- Use a disk scanning and repair tool such as “chkdsk” on Windows or “fsck” on Linux/macOS to check and fix disk errors.
- Make sure the hard drive or SSD is properly and securely connected to the system.
- Regularly back up important data to avoid permanent data loss in case of drive failure.
Troubleshooting CPU
If your computer is overheating, experiencing system crashes, or running slow:
• Monitor CPU temperature using software like Core Temp.
• Clean the CPU heatsink and fan to remove dust and improve cooling.
• Ensure the CPU cooler is seated properly.
• Check for thermal paste application and reapply if necessary.
. Troubleshooting Power Supply Unit (PSU)
If your computer randomly shuts down or restarts:
• Test the PSU with a PSU tester or replace it with a known working one.
• Ensure all power connectors are securely connected to the motherboard, GPU,and other components.
Troubleshooting Peripherals (e.g., Keyboard, Mouse, USB devices)
If your peripherals are not working correctly or are not recognized:
• Try connecting them to different USB ports.
• Test the peripherals on another computer to rule out hardware issues.
• Update or reinstall drivers for the specific device if applicable.
Troubleshooting Motherboard Issues
If you suspect motherboard-related problems, such as no power or erratic behavior:
• Inspect for visual damage or burnt components on the motherboard.
• Check for loose or damaged cables and connections.
• Clear CMOS settings by removing the CMOS battery or using a jumper, if necessary.
• Consult your motherboard’s manual for specific troubleshooting steps.
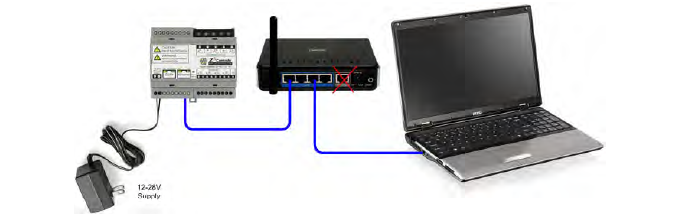
Troubleshooting Network Components (e.g., Ethernet/Wi-Fi)
If you are facing network connectivity problems, try the following steps:
- Restart your router and modem to refresh the network connection.
- Inspect Ethernet cables to ensure they are not loose or damaged.
- Update or reinstall the network drivers to fix possible software issues.
- Use network troubleshooting commands such as “ipconfig” on Windows or “ifconfig” on Linux to diagnose connection problems.
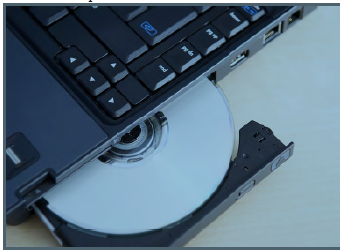
Troubleshooting Optical Drives
If your CD/DVD/Blu-ray drive is not reading discs or ejecting properly:
• Clean the optical drive’s lens with a lens cleaning kit.
• Check for loose or damaged cables.
• Update or reinstall optical drive drivers.
Printer Not Printing
Solutions:
• Check if the printer is powered on and connected (USB or Wi-Fi).
• Make sure it is set as the default printer:
o Windows: Settings > Devices > Printers & scanners > Set as default
• Clear the print queue:
o Right-click printer > “See what’s printing” > Cancel all documents
• Restart the printer and the computer.
2. Printer Offline
Solutions:
• Go to Control Panel > Devices and Printers > Right-click your printer > Select
“Use Printer Online”.
• Check Wi-Fi or USB connection.
• Restart the printer and reconnect it.
3. Paper Jam
Solutions:
- Switch off the printer before attempting any repairs.
- Open all access covers carefully and remove the jammed paper slowly to avoid tearing it.
- Check inside the printer for small pieces of paper that may be stuck.
- Close all covers properly and turn the printer back on.
4. Low or Empty Ink/Toner
Solutions:
- Check the ink or toner levels using the printer software on your computer.
- Replace the ink or toner cartridges if they are empty or low.
- Run the print head cleaning option available in the printer software to improve performance.
5. Poor Print Quality
Solutions:
- Clean the print heads or nozzles to remove dried ink or blockages.
- Align the printer heads through the printer settings menu.
- Use good-quality paper and select the correct paper type in the printer settings.
6. Driver Issues
Solutions:
- Visit the official website of the printer manufacturer.
- Download and install the latest drivers that match your printer model and operating system.
Compiled by Er. Basant Kumar Yadav